Friday, July 31, 2020

HDSP clock fully through-hole revision 3

The only SMD component in the HDSP clock was the USB miniB connector. To make the kit completely beginner-friendly, this connector was replaced by either of its two (right angle or straight) through hole equivalents. Other changes (from revision 2) are:
  • fixed the two smaller pads for DS1307
  • some re-routing (which reduced the number of vias to 5)

The TH right angle USB connector is to be mounted on the top, as shown below.


The straight USB connector can only be mounted on the bottom side of the PCB, as shown below.


This latter configuration allows the clock to be used without any additional enclosure, with just two standoffs holding it in a vertical position, like this:


Assembly instructions for the HDSP clock kit can be found here, with the only difference being the last step, where the miniB USB connector is soldered.


Monday, July 20, 2020

Arduino OLED display shield

The 2.4" I2C OLED display I had sitting idle is too big for the "Promini OLED Clock shield", yet a perfect candidate for a regular Arduino shield. This is how it looks soldered on a prototype shield with two buttons on top, attached to wsduino running the OLED Clock sketch (each of the 5 faces shown):


The current sketch uses U8glib library and takes about 27k of ATmega328's 31k program memory. It could be enhanced by adding alarm (buzzer, relay etc.), since most of the digital pins are available (only D3 and D9 are used for the 2 buttons). Adding NTP time sync (with an ESP8266 module) could also be done, but one/some of the faces will need to be dropped because of memory constraints. All these are exercises/homework for the inquiring minds :)

Note: My nice beveled 2.42" OLED does not seem to be so ubiquitous.


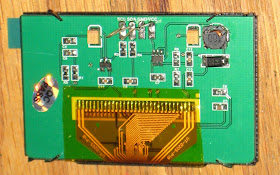
 A quick search on ebay for similar 2.42" OLED displays returns a different style, already mounted on a larger PCB:


This may fit on the Arduino protoshield, but it may look bulky.