- 4 holes in the corners, for encasing;
- addition of I2C signals to the FTDI connector, for expansion;
- the regular push buttons can be replaced with 2-pin right angle buttons;

This revision was successfully used as the assembly kit in the "Introduction to Practical Electronics" course for Grade 6 students.
This would also be a good place for step-by-step assembly instructions, for those who require directions.


melt a bit of solder on the battery pad, to raise it (not pictured)

slide in the CR1220 battery, flat side (+ pole) up (not pictured)


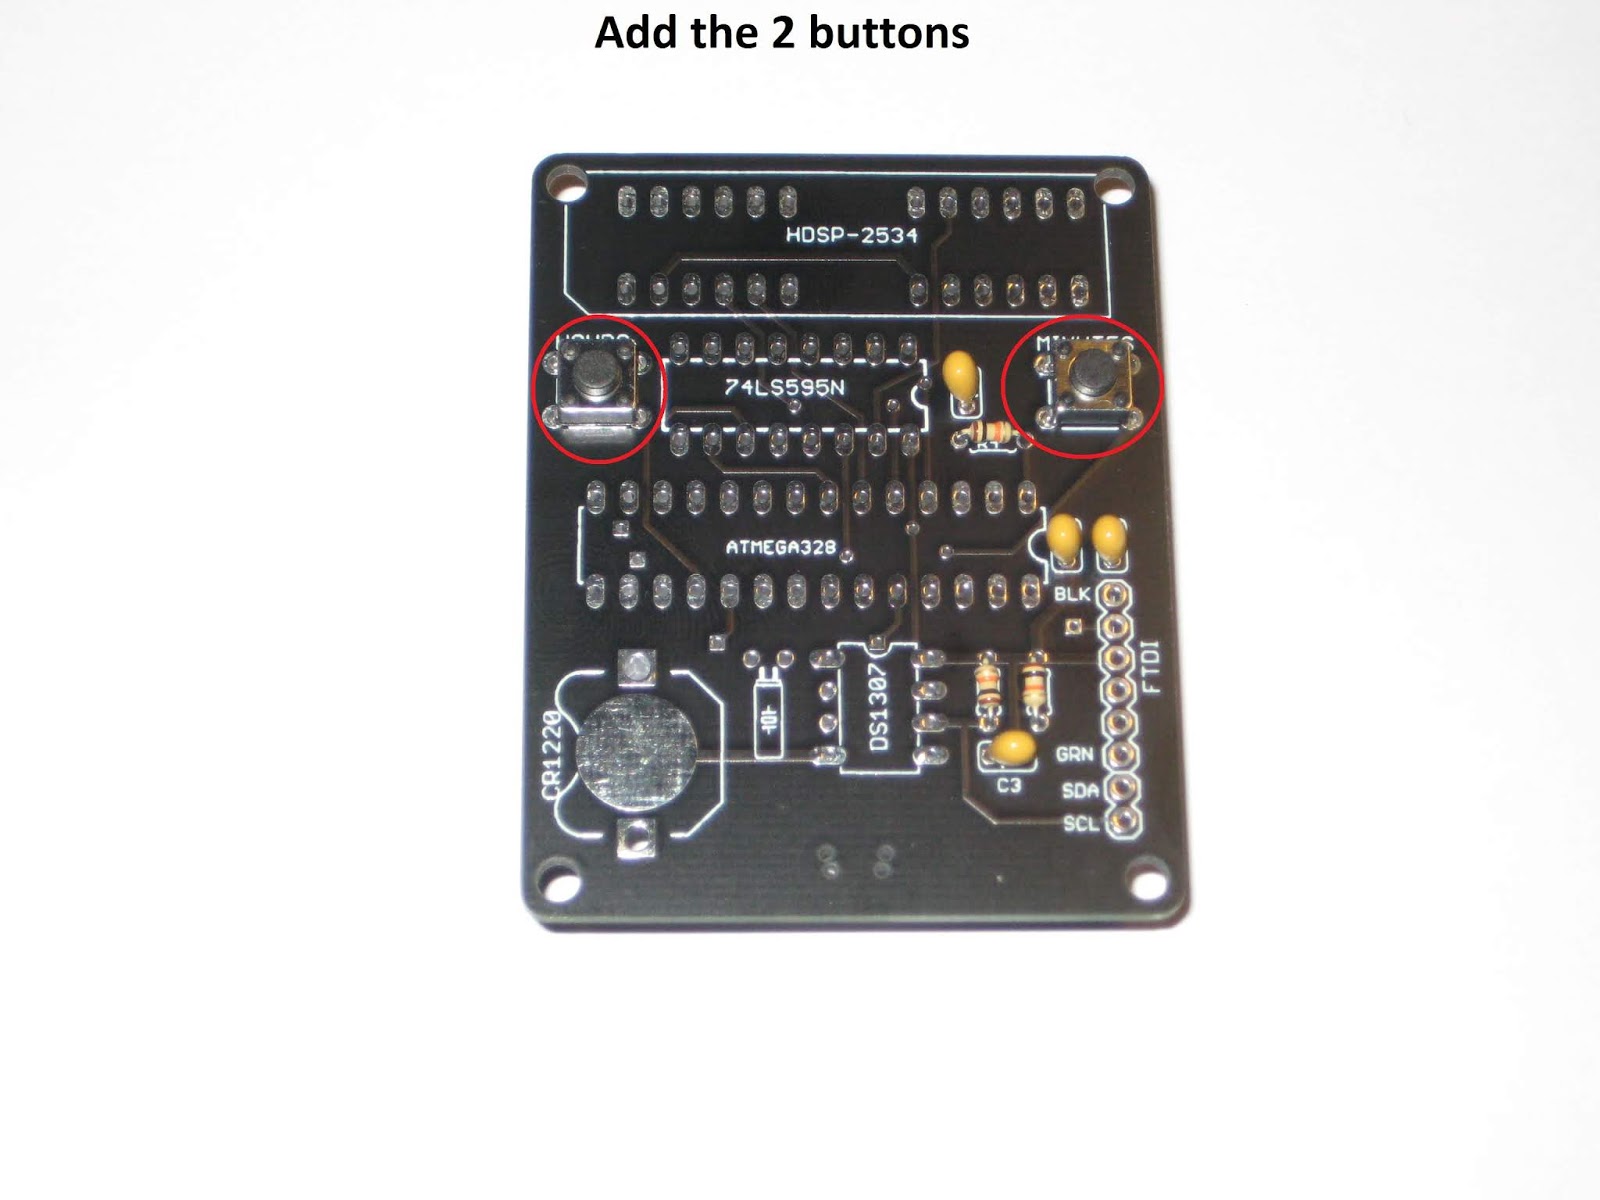
Use a mini B USB cable to power the clock. It should work right away, since the processor is already programmed with the clock software. Use the "Hours" (left) and "Minutes" (right) buttons to set up the time.
Also, insert the CR1220 battery into the holder. It powers the DS1307 RTC (real time clock) when the clock board is disconnected from USB. Note that the small coin battery ONLY powers the RTC integrated circuit, and not the whole clock. The display is lit only when connected to the USB power.
Troubleshooting
- check for missing soldering joints; you may have forgotten to solder some terminals;
- check for solder bridges; solder blobs may accidentally connect adjacent holes/terminals that should not be connected;
- make sure the orientation of the integrated circuits and the display matches the silkscreen, by checking the notches/indentations;
- ensure that the ICs are fully and completely pushed in the socket, until their bottoms touch the socket's plastic;
What's next
1. Catch up on the theory:
- recognize components symbols in schematics;
- recap units of measure for some of the components (ohms for resistors, farads for capacitors); read their intended values (3 digits, color code), measure their real values using a multimeter;
- understand electrical concepts: voltage, current, resistance (and their dependency), frequency; recap their units of measure;
3. Look for a new kit to assemble.


No comments:
Post a Comment