First of all, DIYGeigerCounter is a big kit in a small package; it's got more than 40 through-hole parts, on a PCB that would fit in an Altoids gum tin box (Note: only the PCB, not the Geiger sensor itself, which is too long).
The kit contains both the Geiger analog circuit (that generates the high voltage for the tube) and the ATmega328 microcontroller part (that can eventually drive an LCD), together on the same board.
The version I received is 1.0; the version John is selling is 1.4. The differences are minor: the latest revision has the resistors placed horizontally, a few more headers on the processor side and four screw holes in the corners.
Because of the complexity of the circuit, one needs to take the time to read the assembling instructions. There are lots of resistors and capacitors that need to be placed correctly. And then there are the diodes. To determine their orientations (they are not marked on the silkscreen in revision 1.0), one needs to use the continuity meter and the schematic, which is not a bad thing at all, since one learns about the circuit. (I know that the tendency is to just assemble everything in a haste, because I do that myself. I only learn when something goes wrong and the circuit does not work. Then I have to go to the schematic and use the multimeter.) OK, so no shortcuts here; this kit requires a bit of study, checking and identifying the parts, even crossing them off the list once installed (this is what I did).
Needless to say that the kit worked superbly right off the bat. I measured (with a regular voltmeter, not using the method BroHogan describes here) the high voltage, and it is 310V. It may sound dangerous, but I felt nothing when I touched those pads. The assembled Geiger counter is shown below, without the Geiger tube.
Notice the nice clips for the tube. Other kits usually recommend just wrapping some wire around the tube's terminals, or worst, soldering the wires directly to the tube (this procedure may damage the tube, apparently).
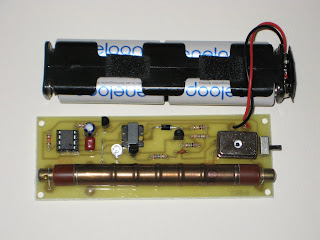
The tube I used for partial testing (since I don't have any radioactive materials just yet) was part of another, much simpler (and much more expensive) kit, from electronic goldmine, shown assembled below.
I just inserted the clips over the installed tube and powered DIYGeigerCounter and started clicking (with the LED turning on) every 2 seconds, giving thus a "reading" of about 30 CPM (clicks per minute).
Next step is the addition of the LCD, detailed here. Then, I will need to build and enclosure, so I can take it out on the field and impress my friends when they chose their granite kitchen counter-tops :)


No comments:
Post a Comment