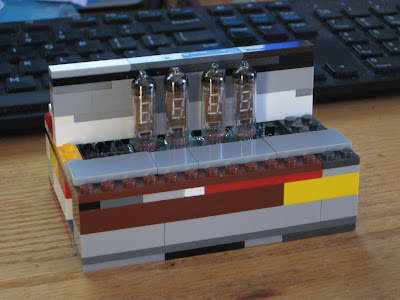
It turns out that most electronics, even prototypes, can be easily enclosed with Lego. And that means no screws, no glue, no fasteners, zero tools, just the bricks and some imagination.
This is the HDSP clock variant with 1" displays driven by HT16K33 (introduced here). The board was cut and filed (0.5mm on each side) to fit snug between the walls (see this).
Next is a HDSP clock variant with two Adafruit Quad Alphanumeric displays.
Both of the above can be mounted on a Lego wall (as found in schools) or they can desk-stand on their own.
Here is an example of a Lego-encapsulated WifiChron.
The PCB was also filed about 0.5mm on each side to fit between the lateral brick walls. It did not have to be fastened in any other way. The ESP8266 module fits inside nicely. The 3 buttons and the USB mini B connector are all easily accessible from the back.
Below is the Lego version of the Axiris clock.
And finally, a couple of OLED clocks, both running the same software on similar hardware: pro-mini + OLED shield and wsduino + 2.42" OLED shield, respectively.
Note that this is the prototype version, using a LiPo battery with charger (similar to the one shown here).
Again, all the above enclosures feel solid: nothing moves or rattles when upside down or even shaken. I did not try dropping them though :)


No comments:
Post a Comment